Archive for the ‘P6 Professional’ Category:

Primavera P6 R8.4 Database Options

Coal miner at work with pick axIn a recent blog for Construction Science I discussed some of the new features of Release 8.4 for Primavera P6 Professional and EPPM. Today I would like to discuss the database options for a standalone installation of P6 Professional. Oracle 10g Express (Oracle XE) has been included with P6 for several years. Users could also choose from one of several versions of Microsoft’s SQL Server, but most opted for SQL Server 2005 Express Edition because it is a free program. Both of these options are still available. But Release 8.4 introduces another option, SQLite. The advantage of SQLite is that it does not have the size limitation of Oracle XE (4 GB) and is easier to manage than Oracle XE or Microsoft SQL. Backing up a database is now as easy as copying a file folder because SQLite is a serverless database engine. For users who have struggled with Oracle XE or Microsoft SQL Server, SQLite seems like a great option.

Ah, but there is a trade-off for simplicity! Oracle’s Application Programming Interfaces (APIs) are not compatible with SQLite. This is something Oracle intends to fix in a future P6 release or patch. APIs are the building blocks of many software programs, and while it is not something most of us would ever realize, Oracle’s Claim Digger is an API. So Claim Digger is not accessible when using SQLite. For me, that is a deal-breaker. I use Claim Digger nearly every day to analyze files. In some situations my clients have more than one version of a baseline schedule or update on their server and they no longer remember why. If some of these files are in fact identical we can delete them without any concern. At the very least, Claim Digger will tell us what the differences are. Most owners also expect contractors to explain what changes were made during the update process, and the Claim Digger report usually suffices.

Claim Digger does have some limitations, which I will discuss in a future blog, and there are third-party programs that are more powerful. However, Claim Digger is included with P6 so it is a tool that all users have access to without spending more money. I will accept free help anytime!

Also, because SQLite is truly a single-user environment, there are several other restrictions:

  • There are no User or Security Profiles, as there can only be one user
  • All projects are opened in Shared mode; Read Only and Exclusive modes are disabled
  • Sending e-mail notifications of Project Issues is not supported
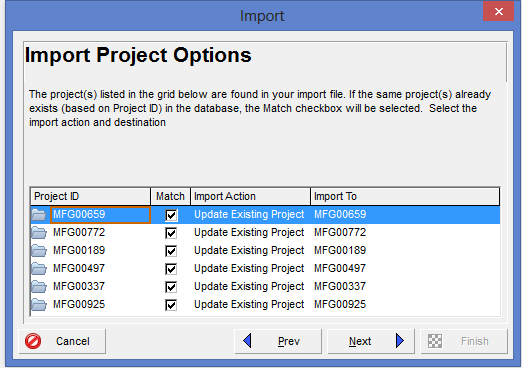
  • Advanced import options are disabled for projects in XML format
  • Check In and Check Out of projects are disabled
  • There are no options to save data for All Users or Another User (layouts, etc.)
  • Job Services is not supported; Jobs cannot be scheduled
  • Update Baseline and Risk Analysis are not supported

The Case Against “Must Finish By”

When setting up a new project, the user will be faced with the “Must Finish By” option. Our advice is to leave it blank. Yes, every project has a finish date. Otherwise, it does not meet the definition of a project. That is to say, a project must be: (1) unique, (2) have a specified time frame, and (3) a defined scope of work. Unfortunately, projects often end up with a longer time frame and increased scope, but that is a subject for another day.

To review, the “Must Finish By” constraint is presented while setting up a new project or by selecting the Dates tab in the Project Details Window after the project has been added to the EPS. The former situation is presented below:

Must Finish By_1


Which begs the question, what is “Must Finish By”. Well, it is basically a project-level constraint that affects all activities. When this constraint is used, no activity can finish after the date selected. In theory, a date prior to project completion could be selected in order to determine how many activities have slipped past a particular date.

Without further ado, here is why we don’t use the “Must Finish By” option:

  • If the user selects a date beyond the latest calculated date, the critical path will have positive Total Float. Showing positive Total Float is a little like putting candy  in the reception area – it tends to disappear. The owner and subcontractors are now aware that activities on the critical path are not so critical any longer. And because Total Float typically belongs to the project, any party is entitled to use the Total Float at their discretion. Without this constraint, the critical path has zero (0) Total Float, even if the project is ahead of schedule.
  • The Schedule Log does not show the “Must Finish By” constraint. Only activity constraints are listed in the Schedule Log, so it is easy for a user to forget (or not realize) that a project constraint has been applied. This can create confusion, especially when the “Must Finish By” constraint is generating negative Total Float. The Schedule Log will not indicate that any constraints are “unsatisfied” because, again, only activity constraints are considered.
  • Activity constraints are revealed in the Start or Finish column (depending on the type of constraint) with an asterisk (*). This feature dates all the way back to P3. There is one exception to this rule – the “As Late as Possible” constraint – but otherwise this is a rather obvious hint that a constraint is being used. Note that in P3, the asterisk appeared in the Early Start or Early Finish column, which is a good reason not to use those columns any longer.
  • The “Must Finish By” constraint does not have a calendar to calculate from so it defaults to midnight of the day before. So a “Must Finish By” date of January 12, 2016 will generate one (1) day of negative Total Float – even when the project is actually finishing on that date. Why? Because the project must finish by midnight the day before to avoid being considered behind schedule. The user must either select the day after the scheduled project finish date as the “Must Finish By” (which makes it seem like the user is unaware of the real contract end date) or choose to show activity durations in hours so that the time of day can be changed. This is illustrated in the next two screenshots.

Must Finish By_2


Must Finish By_3


This is a lot of extra effort just to adjust the date, and many contractors have no desire to show the time of day in their schedules. In a closed network, placing an activity constraint on the last activity is simply a better solution. An activity constraint is also easier for everyone to see and therefore monitor. Any questions or comments? Please feel free to contact me.


Another Reason for Not Using Global Calendars

Students who attend our Primavera P6 training classes know that we prefer to use Project Calendars rather than Global Calendars. One reason is that other users may have the ability to change Global Calendars, which means their changes are applied to any project using that Global Calendar. Obviously there are many situations where that would be a bad thing. Another reason is that when exporting a project that uses Global Calendars, those Global Calendars then wind up in the Global Calendars list of the recipient who imports the project. Frankly, the only time I want to see a project’s calendars is when I have that project open.  And today’s blog deals with a very specific problem of exporting and importing schedules that use Global Calendars.

During one of our classes a student asked me to look at a schedule he had already started on a project his company was building. When I imported the schedule I ran the schedule calculation (F9) so that I could review the Schedule Log. During my review it became apparent that the project end date that I was seeing was different from what the student was seeing. My first thought was that he had forgotten to schedule the project prior to exporting the file, but even after hitting F9 the project end dates did not match. So what the heck was happening?

As it turned out, not only was my student using a Global Calendar, he was using a Global Calendar with the exact same name as a Global Calendar in my database. This rarely happens to me because even a basic 5-day calendar can be labeled so many different ways, such as:

  • 5×8
  • 5 x 8
  • 5-8s
  • Five day calendar
  • 5 day calendar

Anyway, I think you get the idea. My student had used one of the Global Calendars provided with the sample projects that are available when installing Primavera P6. I had the same Global Calendars in my database so, presto, it was easy for my student to pick a Global Calendar name that already existed in my database.

Primavera P6 will not overwrite Global Calendars when importing schedules. My version of the Global Calendar remained intact, which is probably a very good thing when you think about it. But as a result, my student and I had Global Calendars that were the same in name only. His actually had more holidays, so the project end date was later. That was the only reason we were getting different results.

Sharing schedules among databases always introduces concerns when global data is being used. Hopefully you will now understand why it is so important to use project-specific data as much as possible.


Exporting Groups of Projects

Backing up a Primavera P6 database is the best option for moving the entire set of project data – schedules, resources, calendars, layouts, etc. – to another computer. But if the only goal is to move a group of projects from one database to another, there is an easy way to do this very quickly.

We all know that a project must be open in order to be exported. So the first step is to simultaneously open all of the projects that need to be exported. Caveat: you cannot open more than 100,000 activities concurrently in P6 Professional but there is otherwise no limit to how many projects can be opened at the same time. For this reason I recommend exporting groups of projects based on either a Project Portfolio or EPS node.

In the first screenshot I have selected a group of projects based on their EPS Node. I can either highlight projects individually using Shift or Ctrl on the keyboard, or simply highlight the EPS Node itself:

Exporting Multiple Projects_1


Now that the projects are open I can then start the normal export process, as seen in the next two screenshots. The only difference is that I am selecting a common name for all of the projects. I typically name the file after the Project Portfolio or EPS Node to avoid confusing a group of projects with a single project. In this example I have called the common file, “Manufacturing Projects”:

Exporting Multiple Projects_3Exporting Multiple Projects_2


When importing the group of projects I still have the option of importing some or all of the projects. Note that because I am importing back into the same database Primavera P6 is warning me that matches across the board were found.

Exporting Multiple Projects_4


That is all it takes to move a group of projects from one database to another. When I am working on construction claims this is a great way to send the attorneys all of the project files. The size of the common file will of course be larger than normal but XER files are text-based and generally never get too large to email as an attachment.

If you have any comments or questions please feel free to contact me.


How to Tell Which Data Fields Can be Imported via Excel

Microsoft Excel is a great interface for sharing and editing Primavera P6 data. I often send spreadsheets to clients for their input on data such as durations and budgets. For clients who do not own P6 or understand how to use it, Excel is an easy way to communicate changes. In fact, I typically request that my clients use spreadsheets to submit progress for updates; inputting progress manually inside P6 takes too long and introduces the possibility for errors.

It is very important to understand which data fields can be imported via Excel to avoid wasting time making changes in the spreadsheet. Thankfully, P6 will always warn us if we know where to look.

The quickest way to export P6 data to Excel is to right-click inside the Activity Table, which brings up the following menu:

Excel Export from Activity Table Menu


There are some limitations, however, to this export method. Some of these limitations are:

  • All activities currently displayed in the Activity Table are exported; you must filter the activities in the Activity Table first to limit the number of activities being exported
  • All columns currently displayed in the Activity Table are exported; you must change the layout to see other columns or to limit how many columns are exported

Note that Activity ID, Activity Status, and WBS Code are always exported regardless of whether they are currently displayed. This is because P6 needs these references for any changes you might want to import back into P6.

The image below shows some typical data fields displayed when exporting directly from the Activity Table to Excel:

Excel Export from Activity Table


Here is how you can tell which data fields can be imported via Excel: data fields that have an asterisk (*) in the second row of the title can not be imported. In the above example Budgeted Total Cost has an asterisk. While this data can be exported directly from the Activity Table, any changes made to the budgets will not import. Similarly, changes can not be made to the Start or Finish dates; these are calculated fields. Activity Name and Original Duration, on the other hand, can be modified in Excel and the changes will import.

In the next example I am going to export P6 data using the spreadsheet template method. While this takes a little longer to set up, it offers the distinct advantage of allowing users to export:

  • Activity Relationships
  • Expenses
  • Resources
  • Resource Assignments

These are considered to be Subject Areas and each Subject Area will appear as a separate tab in Excel. More importantly, users can edit data in these tabs and import the changes back into P6. (There are some limitations to what type of data can be modified in which tabs that I will point out in a moment).

To create a spreadsheet template, select File > Export > Spreadsheet – (XLS):

Excel Export from Template Menu_Step 1


Because I want to edit budgeted costs for my activities I have chosen the Resource Assignments Subject Area during the export process, as seen below:

Excel Export from Template Menu_Step 2


Budgeted units and costs can only be modified in the Resource Assignments tab in Excel. Resource Assignments can be displayed in the Activities tab but any modifications made to the budgets in this tab will not import.

In the next screenshot I have selected Budgeted Cost as a data field.Note that the data field does not mention the type of resource (labor, nonlabor or material) because each resource assigned to the same activity will appear on a different line in the spreadsheet. P6 therefore does not need to be told the resource type.

Excel Export from Template Menu_Step 3


The final image shows the spreadsheet created by the template. This time there is no asterisk in the Budgeted Cost title, meaning this data can be modified and imported back into P6.

Excel Export from Template


But notice what can not be edited – the Activity Name. The Activity Name can only be edited in the Activity tab (which I did not include in this template) or in the initial spreadsheet exported from the Activity Table. Every tab has some limitations in terms of what data fields can be imported. The Subject Area should be your first clue.

In any case, that little asterisk is a big help once you realize what it means!


P6 EPPM vs. P6 Professional

Yesterday I delivered a P6 training session to a client  who bought the enterprise (EPPM) version of this software for the wrong reason. There is a perception based on rather confusing marketing materials put together by Oracle that if you want to log in remotely to a database you must buy P6 EPPM. Nothing could be farther from the truth. But anyone who tries to muddle their way through Oracle’s website would have a hard time figuring this out.

P6 EPPM is web-enabled software. Notice I did not say “cloud” software. There is a big difference. When you buy P6 EPPM you still install it on a server in your offices. Once installed on a server, users access P6 EPPM using their Web browser. More on that in just a moment.

Deploying P6 EPPM in a large organization can certainly have benefits. Rather than installing P6 software on hundreds of computers you install it once. That is a pretty good deal and nearly as practical as true “cloud” software hosted on someone else’s servers. One of my clients has several hundred named users – meaning people who have access to the software – and not surprisingly they are using P6 EPPM.

So what about remote access using P6 Professional? Well, it’s not too difficult for anyone to gain remote access to a database regardless of which version of P6 they are using. You simply install the database on a server and users connect to it remotely using a Virtual Private Network (VPN) or some similar means of networking. Admittedly I know nothing about setting up a VPN but this is easy for an IT person to do. And most companies already have something like this in place already.

Because P6 EPPM is web-enabled, however, you are accessing files on the Internet. Lose your Internet connection and you are not getting any work done. With P6 Professional, you can install one database on your laptop and another on a regular server. This way you always have access to a database. Another advantage with P6 Professional is that using a Web browser is much slower than using software that resides on a computer. Each time you leave one window in P6 EPPM you are waiting for your browser to load another one. Unless you have a very fast Internet connection this will drive you a little crazy.

The Web browser introduces still another problem. P6 EPPM will not function correctly unless you are using Internet Explorer 8. Love Google Chrome? Too bad, because it will not work with P6 EPPM. And forget about using Mozilla Firefox as well. And frankly, who is still using IE 8 other than maybe Al Gore? Okay, that was a cheap shot at the guy who once claimed to have invented the Internet, but the point is most of us have already upgraded to something else – a long, long time ago.

Java also rears its ugly head in P6 EPPM, which requires a very specific version of Java that is several years old. Java is a programming language used by many applications and websites. Ironically, Oracle owns Java but P6 EPPM has to make do with a really old version. My client with the hundreds of named users quickly discovered that it had several different versions of Java installed on various machines. And during my class yesterday I could not get the Project Preferences pop-up window to appear no matter what I tried. Cursed Java strikes again!

(To be fair, P6 Professional also uses Java but because you are using the program in a standalone environment the older version of Java is not much of an issue).

So have I convinced you to switch to P6 EPPM yet? Look, P6 EPPM is fine for large organizations since it makes deployment much easier. But when I show people P6 Professional side-by-side with P6 EPPM, they always pick P6 Professional. If you have only a few named users, P6 Professional is easy to deploy. You might only need to install P6 EPPM once, but the last time I installed it required an entire weekend and several phone calls to Oracle Support.

When it comes down to scheduling projects – which is the point, after all – P6 Professional is easier to use, and much faster. But not to worry. P6 EPPM software includes P6 Optional Client in addition to the Web-enabled software, and P6 Optional Client is basically P6 Professional with just a few minor differences. Yet many people who purchase P6 EPPM are not even aware that another version of the program is included. Oracle simply does not explain this very well at all, but now you know!